If you follow this blog or know me at all you will already know I am not a sweets person neither I am a great baker, I think I am a better cook. 
Chocolate construction cake
Ingredients
- 2 cups all purpose flour
- 3/4 cup hot water
- 1 1/4 cups unsalted butter
- 8 ounces chocolate
- 1/2 cup milk
- 1/2 cup cocoa powder
- 4 eggs
- 2 3/4 cups granulated sugar
- 2 tablespoons instant coffee
- 2 tablespoons vegetable oil
- 1/2 teaspoon baking soda
- 2 teaspoon baking powder
- 1 teaspoon salt
Instructions
- Bring about an inch of water to a simmer in your saucepan. Set the heatproof bowl in the mouth of the pot, making sure the water doesn’t touch the bottom of the bowl. Add chocolate, butter and sugar, stir occasionally as it softens. Meanwhile dissolve the coffee on the hot water and add it to the chocolate butter mix. Stir until well combined. When all the sugar have melted remove bowl from heat.
- Pre-heat the oven at 300 F or 150 C.
- Add the milk, this will help decrease the temperature of the chocolate, mix with a hand mixer, the one by one add the eggs, mixing well before adding the following egg. Then add the vegetable oil. Sift all the dry ingredients together, then add onto the liquid and mix until well combined.
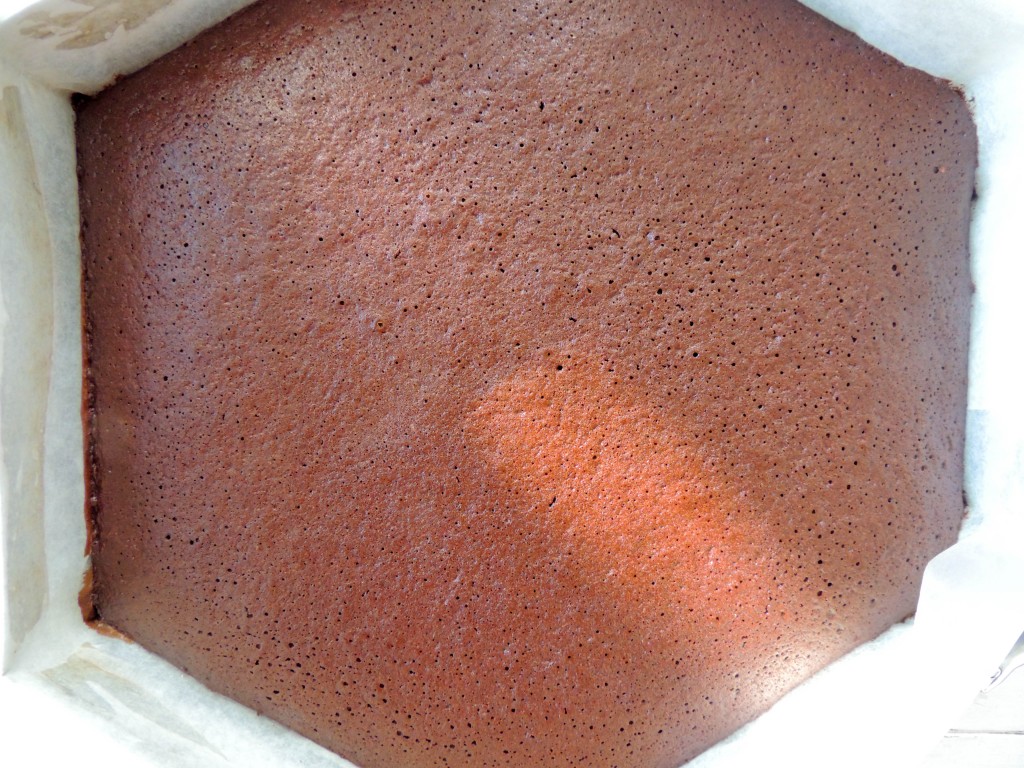
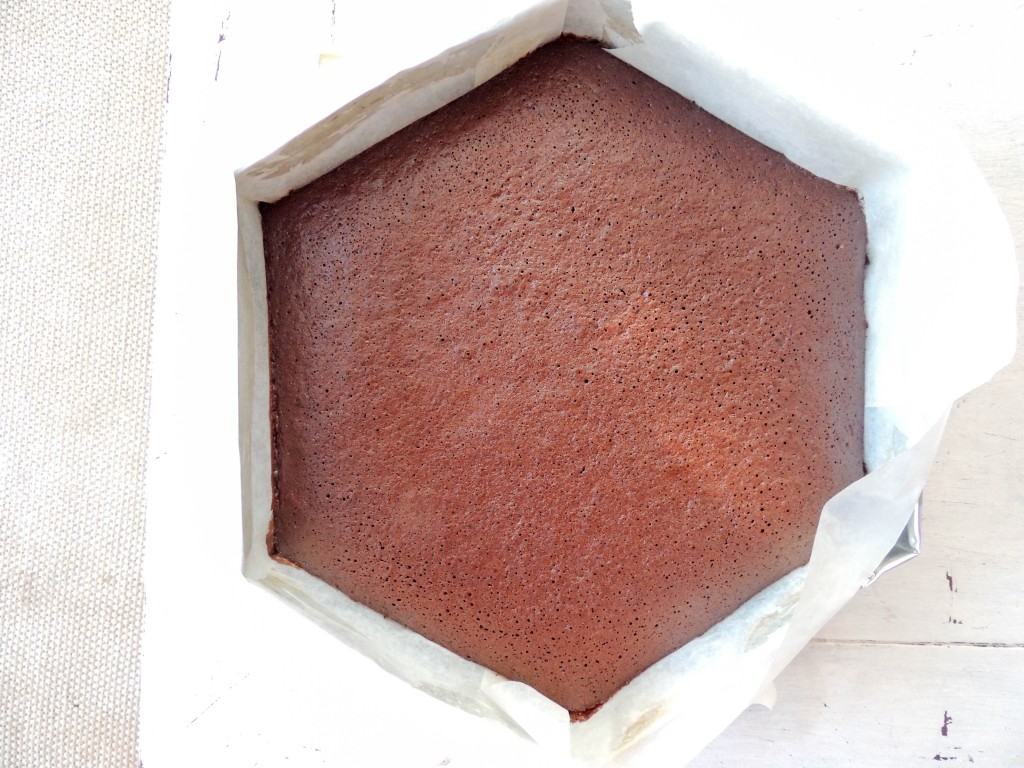
- Lined your baking mold with parchment paper, add the chocolate mix and bake for two hours.
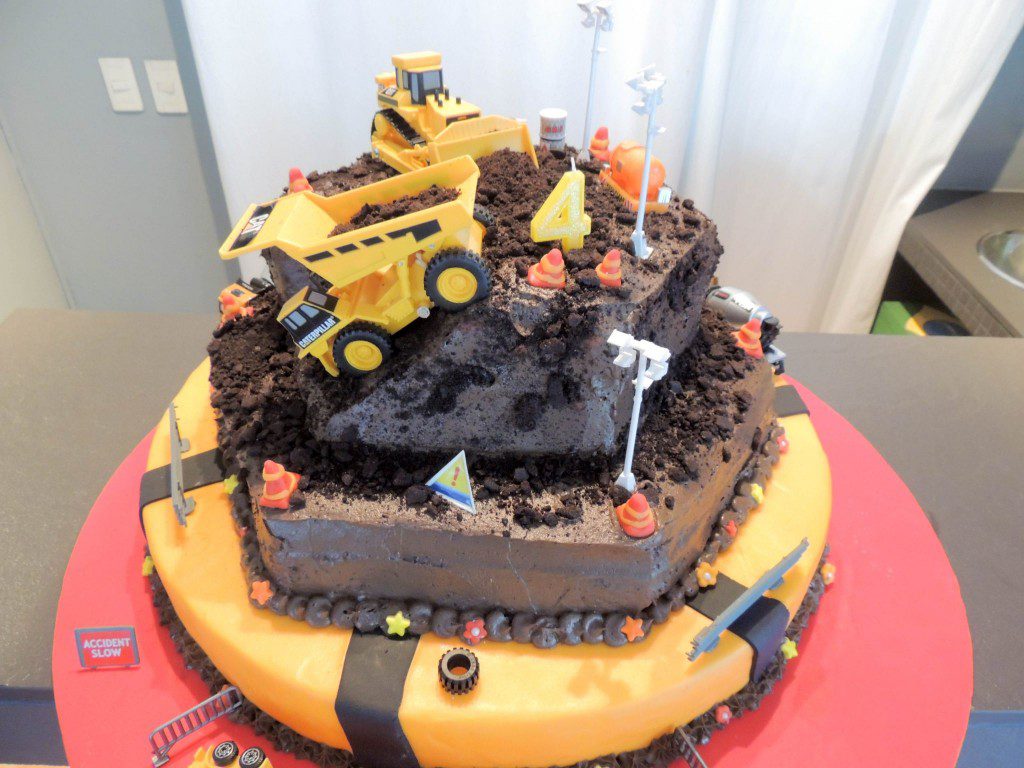
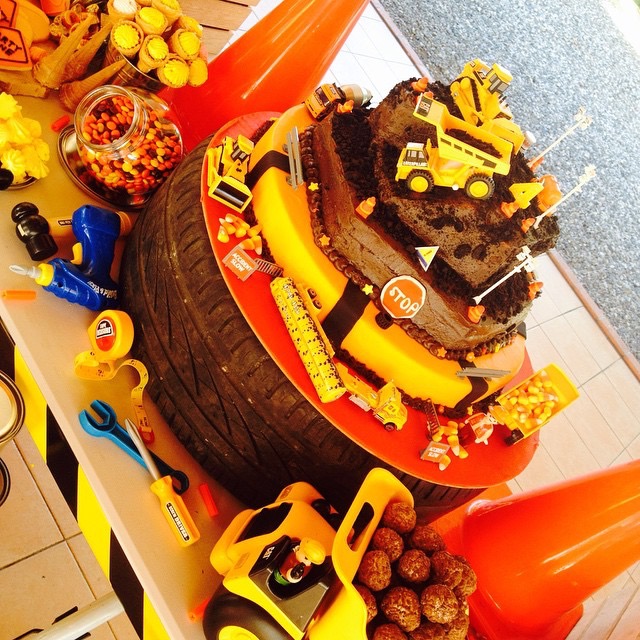
Went to a baking supplies store near my house and bought all things I needed in order to put them together. I decided to go chocolate all the way, chocolate cake, chocolate, and Nutella filling and chocolate buttercream with crumbled Oreos (posing as dirt). I made my marshmallow fondant recipe three times to get this cake ready.
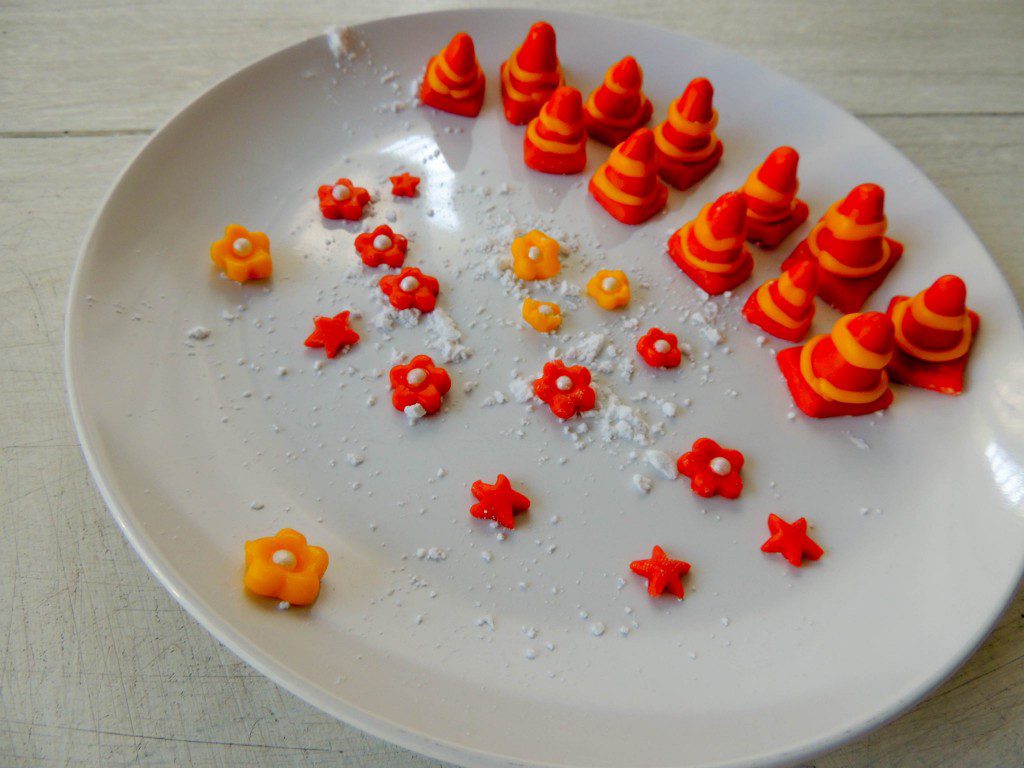
I covered a circular carton board with orange fondant, then fixed a smaller cake dummy on top, and covered that with yellow and black fondant. Once I frosted all my cake I used wooden dowels within the diameter of the cake for support (you can also use heavy-duty bar straws or bubble tea straws or wooden skewers to support your cake). This is very important when you are doing a tiered cake. Then I took a big chunk off the top layer cake to place my truck, covered everything with oreo cookie crumble, and placed all the fondant figurines and all the rest of the toys.
Marshmallow fondant
Ingredients
- 1 package 16 ounces white mini marshmallows (use a good quality brand)
- 2 -4 tablespoons water
- 8 cups sifted confectioners’ sugar
- 1/2 cup solid vegetable shortening
Instructions
- To make marshmallow fondant, place marshmallows and 2 tablespoons of water in a microwave-safe bowl. Microwave 30 seconds on high; stir until mixed well. Continue microwaving 30 seconds more; stir again. Continue until melted (about 2 1/2 minutes).
- Place 3/4 of the confectioners’ sugar on top of the melted marshmallow mixture. Fold sugar into marshmallow mixture. Flavoring can be added at this point if desired. Place solid vegetable shortening in easily accessed bowl so you can reach into it with fingers as you are working. Grease hands and counter GENEROUSLY; turn marshmallow mixture onto counter. Start kneading like you would dough. Continue kneading, adding additional confectioners’ sugar and re-greasing hands and counter so the fondant doesn’t stick. If the marshmallow fondant is tearing easily, it is too dry; add water (about 1/2 tablespoon at a time) kneading until fondant forms a firm, smooth elastic ball that will stretch without tearing, about 8 minutes.
- It’s best to allow Marshmallow Fondant to sit, double-wrapped, overnight. Prepare the fondant for storing by coating with a thin layer of solid vegetable shortening, wrap in plastic wrap and then place in resealable bag. Squeeze out as much air as possible. Marshmallow Fondant will keep well in refrigerator for several weeks.
- When not working with fondant, make sure to keep it covered with plastic wrap or in a bag to prevent it from drying out. When ready to use, knead fondant until smooth. Roll out fondant 1/8 in. thick.
- To color fondant: If you need to tint the entire batch of fondant, add a little icing color to the melted marshmallow mixture before adding confectioners’ sugar. For smaller amounts of tinted fondant, add icing color to portions of fondant as needed.
Happy baking!
Bizcocho de chocolate de construcción
Si sigues este blog o me conoces, ya se sabes que yo no soy una persona de mucho dulce ni que soy una gran pastelera, creo que soy mejor cocinera. 
Bizcocho de chocolate de construcción
Ingredients
- 2 tazas de harina
- 3/4 taza de agua caliente
- 1 1/4 tazas de mantequilla sin sal
- 8 onzas de chocolate
- 1/2 taza leche
- 1/2 taza de cacao en polvo
- 4 huevos
- 2 3/4 tazas de azúcar granulada
- 2 cucharadas de café instantáneo
- 2 cucharadas de aceite vegetal
- 1/2 cucharadita de bicarbonato de sodio
- 2 cucharadita de polvo de hornear
- 1 cucharadita de sal
Instructions
- Poner a calentar una pulgada de agua a fuego lento en su cacerola. Ajuste el recipiente resistente al calor en la boca de la olla, asegurándose de que el agua no toque el fondo del tazón. Añadir el chocolate, la mantequilla y el azúcar, revolver de vez en cuando mientras se va derritiendo. Mientras tanto disolver el café en el agua caliente y añadirlo a la mezcla de mantequilla y chocolate. Revuelva hasta que esté bien combinado. Cuando todo el azúcar se haya derretido, retire el tazón del fuego.
- Precalentar el horno a 300 F o 150 C.
- Añadir la leche, esto ayudará disminuir la temperatura del chocolate, mezclar con una batidora de mano, agregar uno a uno los huevos, mezclando bien antes de añadir el siguiente huevo. A continuación, añadir el aceite vegetal. Tamizar los ingredientes secos, luego añadir en el líquido y mezclar hasta que esté bien combinado.
- Alinee su molde para hornear con papel pergamino, agregue la mezcla de chocolate y hornee durante dos horas.
Fue a una tienda de suministros de cosas de hornear cerca de mi casa y compré todas las cosas que necesitaba para poner hacer y decorar este bizcocho. Decidí ir al máximo en chocolate, pastel de chocolate, relleno de chocolate y nutella y crema de mantequilla de chocolate con galletas Oreo desmenuzadas (para pasar por la tierra). Hice mi receta de fondant de malvavisco tres veces para cubrir todo este bizcocho.
Cubrí un tablero de cartón circular con fondant naranja, le fijé un camuflaje de bizcocho más pequeño en la parte superior y lo cubrí con fondant de color amarillo y negro. Coloqué mis bizcochos sobre este camuflaje y los aseguré con unos pinchos o brochetas de madera dentro del diámetro del pastel para darle soporte (también se puede utilizar pajillas o pajuelas de té de burbujas o pinchos de madera para asegurar su pastel). Esto es muy importante cuando usted está haciendo un bizcocho de varios pisos. Luego tomé un pedazo grande del bizcocho superior para colocar mi camión, cubrí todo con galletas oreo desmenuzadas y puse todas las figuritas de fondant y todo el resto de los juguetes de construcción que tenía.
Fondant de malvaviscos
Ingredients
- 1 paquete 16 onzas de mini malvaviscos blancos (utilizan una marca de buena calidad)
- 2 -4 cucharadas de agua
- 8 tazas de azúcar glass tamizada
- 1/2 taza de manteca vegetal sólida
Instructions
- Para hacer la pasta de fondant de malvaviscos, coloque malvaviscos y 2 cucharadas de agua en un recipiente para microondas. Cocine en el microondas por 30 segundos; revuelva hasta que se mezcle bien. Continuar cocinando en el microondas 30 segundos más; mezclar de nuevo. Continúe hasta que se derrita (aproximadamente 2 1/2 minutos).
- Coloque 3/4 de azúcar impalpable en la parte superior de la mezcla de malvavisco derretido. Mezclar el azúcar con los malvaviscos. Puede agregar saborizante en este momento, si desea. Colocar la manteca vegetal sólida en un recipiente de fácil acceso para que pueda llegar a él con los dedos mientras trabaja. Engrase las manos y la superficie de trabajo GENEROSAMENTE; colocar la mezcla de malvavisco en la superficie de trabajo. Comience a amasar como lo haría con una masa. Continuar amasando, añadiendo azúcar glas adicional y re-engrase y la superficie de trabajo tanto como sea necesario para que la pasta de azúcar no se pegue. Si el fondant de malvavisco se rompe fácilmente, está demasiado seco; añadir agua (aproximadamente 1/2 cucharada a la vez) amasar hasta que el fondant forme una bola firme, lisa y elástica que se extenderá fácilmente, aproximadamente 8 minutos.
- Lo mejor es permitir que el fondant repose durante la noche. Prepare el fondant para descansar cubriéndolo con manteca vegetal, luego envuelva en papel plástico y coloque en una bolsa con cierre (Tipo Ziplock). Exprima el aire tanto como sea posible. El fondant se puede mantener así en el refrigerador durante varias semanas.
- Cuando no está trabajando con fondant, asegúrese de mantenerlo cubierto con plástico o en una bolsa para evitar que se reseque. Cuando esté listo para usar, amase hasta que esté suave. Estire el fondant hasta un espero de 1/8 pulg. aproximadamente.
- Para colorear fondant: Si tiene que teñir todo el fondant, añadir un poco de colorante alimenticio a la mezcla de malvavisco derretido antes de añadir el azúcar glas. Para cantidades más pequeñas de fondant teñido, añadir el color a porciones del fondant, según sea necesario y amasar hasta que esté uniforme.
¡Sean felices horneando!




6 thoughts on “Chocolate construction cake”
So, you think you’re not a great baker? That is the most delicious construction site I’ve ever seen. And fun! Way to go, Gaila!
Ohhh Adam you are just sweet talking me!! But I am grateful for your kind words! Cheers!
This cake is absolutely adorable, G! Obviously you need to bake more, because this cake is epic! Makes me wish I was a little boy so I could ask you to make it for me!!! Cheers doll!
Chey!! you have put a big smile on my face! hahaha I will bake for you whenever you’d like!!
Wow tha chocolate cake looks soil amazing bake craft
Kerry!! thank you for stopping by.